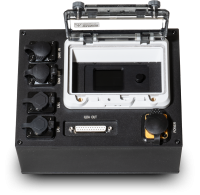


3.1. Laser mainboard with Display - Automatic Operation

Full Automatic / Stand Alone Operation
Full Automatic / Stand Alone Operation
In stand-alone operation mode the ILDA files on the internal memory are triggered automatically. They are not modified, but just consecutively played back as they are saved to the memory and in a general loop. The playback speed and the duration of the playback of each file depends on the number of frames each file consists off (Video: Adjust the speed of an animation in Showeditor).
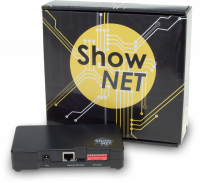
The frames-per-second rate can be set using the ShowNET Admin Tool, but usually does not need to be changed.
This setting is especially suitable for demo purposes or for fixed laser installations.
The frames-per-second rate can be set using the ShowNET Admin Tool, but usually does not need to be changed.
This setting is especially suitable for demo purposes or for fixed laser installations.
Set the Stand-Alone operation mode using the rotary dial at the display:
- Press the rotary dial, so the text is not marked in green any more
- Turn the rotary dial until the Automatic mode is selected:
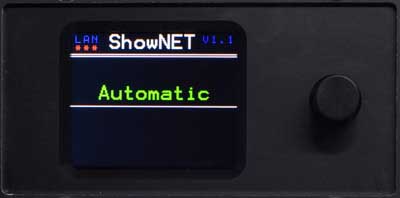
- Press the rotary dial to activate the Automatic mode (it is highlighted in green if activated)

DEMO Operation with automated animation
DEMO Operation with automated animation
In Demo Mode the ILDA files on the internal memory are triggered automatically and are automatically animated by the laser mainboard's integrated intelligence.
This creates dynamic animations, even if only static frames are saved on the internal memory.
This setting is especially suitable for non-controlled show use like in small nightclubs, by mobile DJs or for demo purposes.
The master laser sends the control signal and thus triggers the slave laser to do the same. All lasers in a master-slave chain should have the same ILDA files on their internal memories, otherwise the result would be different.
There can only be one master in a master-slave chain, but there can be several slave devices.
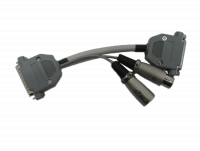
A slave laser requires a master system to provide the control signal. Multiple slave systems can be triggered by one master. Just daisy-chain the signal from the master through all slave lasers with DMX cable.
This creates dynamic animations, even if only static frames are saved on the internal memory.
This setting is especially suitable for non-controlled show use like in small nightclubs, by mobile DJs or for demo purposes.
Demo configuration with using the rotary dial at the display
- Press the rotary dial, so the text is not marked in green any more
- Turn the rotary dial until the Demo Mode is selected:
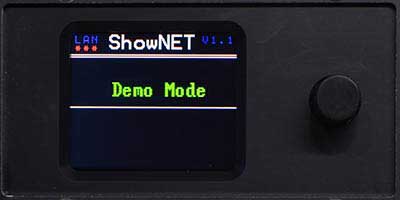
- Press the rotary dial to activate the Demo Mode (it is highlighted in green if activated)
Master-Slave Demo configuration
The intelligent laser mainboard can be used for controlling laser systems in master-slave operation. This means, that one laser acts as "master" and the others as "slaves". They are linked with standard DMX cables.The master laser sends the control signal and thus triggers the slave laser to do the same. All lasers in a master-slave chain should have the same ILDA files on their internal memories, otherwise the result would be different.
Master configuration
To configure a laser system as Master in Demo mode, set the laser to Master - Demo-mode.- Press the rotary dial, so the text is not marked in green any more
- Turn the rotary dial until the Master - Demo Mode is selected:

- Press the rotary dial to activate the Master- Demo Mode (it is highlighted in green if activated)
There can only be one master in a master-slave chain, but there can be several slave devices.
Slave configuration
To configure a laser system as Slave in Demo mode, set the laser to Slave.- Press the rotary dial, so the text is not marked in green any more
- Turn the rotary dial until the Slave mode is selected:
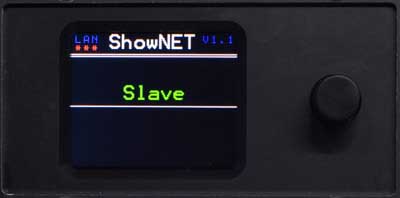
- Press the rotary dial to activate the Slave Mode (it is highlighted in green if activated)
A slave laser requires a master system to provide the control signal. Multiple slave systems can be triggered by one master. Just daisy-chain the signal from the master through all slave lasers with DMX cable.

Sound-to-Light Operation
Sound-to-Light Operation
This mode is only available for lasers with an integrated microphone!
This creates dynamic animations synchronized with the beats of the music, which allow a fast & easy start with the laser. No additional external control is required.
This setting is especially suitable for DJs who need to operate the laser in a simple but effective way.
Sound-to-Light configuration with the rotary dial at the display
To activate the Sound-to-Light operation mode, set the display to Sound-to-Light mode:- Press the rotary dial, so the text is not marked in green any more
- Turn the rotary dial until the Sound-to-Light mode is selected:
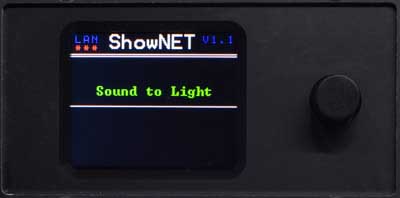
- Press the rotary dial to activate the Sound-to-Light Mode (it is highlighted in green if activated)
Master-Slave configuration with Sound-to-Light Operation
The intelligent laser mainboard can be used for controlling laser systems in master-slave operation. This means, that one laser acts as "master" and the others as "slaves". They are linked with standard DMX cables.The master laser sends the control signal and thus triggers the slave laser to do the same. All lasers in a master-slave chain should have the same ILDA files on their internal memories, otherwise the result would be different.
Master configuration
To configure a laser system as Master in Sound-to-Light mode, set the Display to Master Sound2Light using the rotary dial.- Press the rotary dial, so the text is not marked in green any more
- Turn the rotary dial until the Master Sound2Light mode is selected:
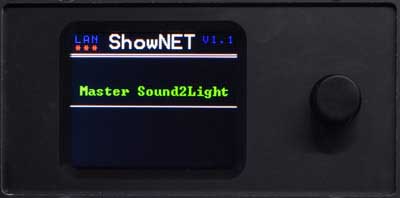
- Press the rotary dial to activate the Master Sound2Light Mode (it is highlighted in green if activated)
There can only be one master in a master-slave chain, but there can be several slave devices.
Slave configuration
To configure a laser system as Slave in Sound-to-Light mode, set the Display to Slave mode using the rotary dial.- Press the rotary dial, so the text is not marked in green any more
- Turn the rotary dial until the Slave mode is selected:
- Press the rotary dial to activate the Slave Mode (it is highlighted in green if activated)
A slave laser requires a master system to provide the control signal. Multiple slave systems can be triggered by one master. Just daisy-chain the signal from the master through all slave lasers with DMX cable.

Single File Playback
Single File Playback
Single file playback mode allows for selecting individual files on the internal memory. This is especially helpful if there are several files on the internal memory, but only one specific file shall be displayed, like for advertising projections, single-beam-applications, alignment works or test picture projection.
First of all the laser needs to be set to single file operation mode:

First of all the laser needs to be set to single file operation mode:
- Press the rotary dial, so the text is not marked in green any more
- Turn the rotary dial until the Single File mode is selected:
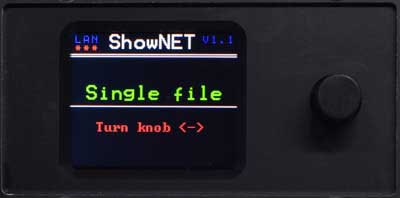
- Press the rotary dial to activate the Single File Mode (it is highlighted in green if activated)
- Turn the rotary dial to select the desired projection file. Do turn gently and not too fast.
- If the desired file shows, press the rotary dial to confirm the selection.
If the laser should always project the same pattern, even after power off and power on again, it is advised to only store one single ILDA file to the internal memory.
Master - Slave modes
Master - Slave modes
The intelligent laser mainboard can be used for controlling laser systems in master-slave operation. This means, that one laser acts as "master" and the others as "slaves". They are linked with standard DMX cables.
The master laser sends the control signal and thus triggers the slave laser to do the same. All lasers in a master-slave chain should have the same ILDA files on their internal memories, otherwise the result would be different.
The master-slave operation principle is:
These signals are just trigger signals, so no intelligence is transmitted - this already resides in the slave lasers.
In master-slave operation only the master laser is relevant, the slaves just act to the trigger of the master.
Master-slave operation is possible in Sound-to-Light mode or Demo-Mode:
The master laser sends the control signal and thus triggers the slave laser to do the same. All lasers in a master-slave chain should have the same ILDA files on their internal memories, otherwise the result would be different.
The master-slave operation principle is:
- the master laser sends out DMX control signals
- the slave lasers act according to these signals
These signals are just trigger signals, so no intelligence is transmitted - this already resides in the slave lasers.
In master-slave operation only the master laser is relevant, the slaves just act to the trigger of the master.
Master-slave operation is possible in Sound-to-Light mode or Demo-Mode:
Master - Slave for Demo mode
Master - Slave for Sound to Light mode
Remember:
Master-Slave does NOT work with the ILDA port, as the internal mainboard does not create an ILDA output signal. However, if an external ILDA signal is feeded to one laser's ILDA IN port, the ILDA signal can be daisy-chained to other lasers. But this requires an external ILDA control signal input in first place.
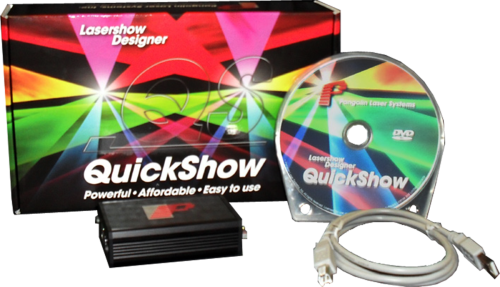
Optional: Customize the content of the internal memory, make custom "Gobos" with free software
It is very easy to create custom "Gobos" for the ShowNET Laser Mainboard - they can not only be static, like with conventional lighting, but be animated and colorful.
Here are detailed instructions on how custom laser content can be created, saved and uploaded to the ShowNET Laser mainboard:
How to create and upload custom Laser content
Here are detailed instructions on how custom laser content can be created, saved and uploaded to the ShowNET Laser mainboard:
How to create and upload custom Laser content