


4.1. Pangolin Flashback 4 internal - Automatic Operation

Autoplay operation
Autoplay operation
The Autoplay mode allows one or more lasers to start and play content at specific predefined times or when the power of the laser is turned on. Autoplay requires that content is prepared through the FB4 export Utility inside QuickShow or BEYOND. This wizard will also allow you to schedule the shows that are stored on the SD card. Preparing content for automatic playback requires an ethernet connection with QuickShow or BEYOND. The actual playback does not require any cable connection.
During this operation mode, the following menu options will be available:
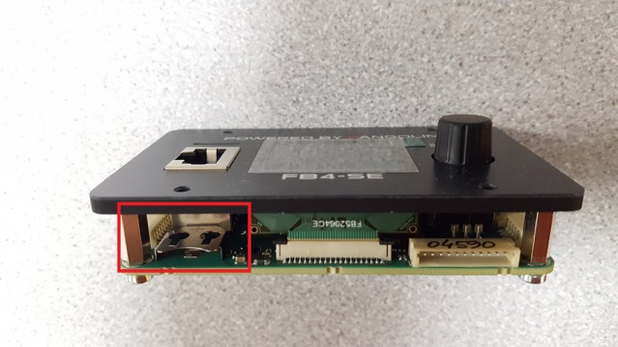
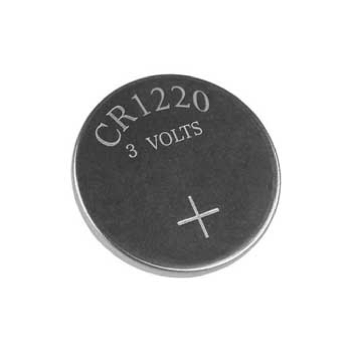
When scheduled content needs to be played on specific date and times, installation of a battery is needed. As deliverd, FB4 comes without battery. A battery can be installed to enable the real-time clock. Date and time can be setup through the QuickShow or BEYOND FB4 Export utility. The battery type required for this purpose is “CR1220”. The battery can be installed by pointing the negative side of the battery towards the circuit board.
- Configure the Autoplay operation mode:
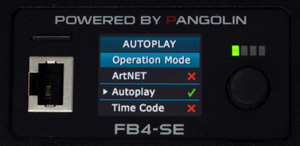
Turn the selection rotary dial until the cursor points to the menu item "Operation mode" and press it once to expand the menu options: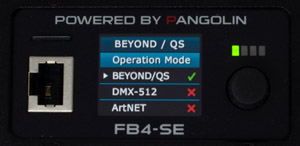
- Turn the rotary dial until the cursor points to the desired operating mode (Autoplay) and press it once. The selected operation mode (Autoplay) is now active:
- Turn the selection rotary dial until the cursor points to the menu item "Autoplay Setup" and press it once. The following settings become available:
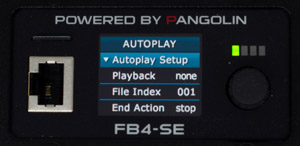
- Playback:
- File Index:
- End Action:
During this operation mode, the following menu options will be available:
- Operation Mode
- Autoplay Setup
- Master Settings
- Geo Correction
- Color Settings
- Scan Guard
- FB4 Device Info
- Exit Menu
When scheduled content needs to be played on specific date and times, installation of a battery is needed. As deliverd, FB4 comes without battery. A battery can be installed to enable the real-time clock. Date and time can be setup through the QuickShow or BEYOND FB4 Export utility. The battery type required for this purpose is “CR1220”. The battery can be installed by pointing the negative side of the battery towards the circuit board.

Timecode mode
Timecode mode
Timecode setup offers the ability to start a show based on an incoming Artnet timecode signal. The FB4 will execute the file once the offset time mark has been received. The file that is executed needs to be prepared through Laser Show Designer QuickShow or BEYOND it's FB4 export utility.
During this operation mode, the following menu options can be controlled:
- Configure the Timecode operation mode:
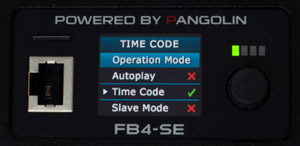
Turn the selection rotary dial until the cursor points to the menu item "Operation mode" and press it once to expand the menu options: - Turn the rotary dial until the cursor points to the desired operating mode (Time Code) and press it once. The selected operation mode (Time Code) is now active:
- Turn the selection rotary dial until the cursor points to the menu item "Timecode Setup" and press it once. The following settings become available:
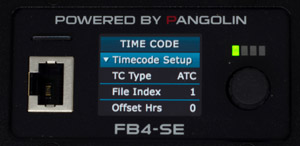
- TC Type: ATC
- File Index: The actual file that will be executed as soon as the offset has been reached.
- Offset Hrs: The hour mark the FB4 should respond on.
- Offset Min: The minute mark the FB4 should respond on.
- Offset Sec: The second mark the FB4 should respond on.
- Offset mS: The milisecond mark the FB4 should respond on.
During this operation mode, the following menu options can be controlled:
- Operation Mode
- Time Code Setup
- Master Settings
- Geo Correction
- Color Settings
- Scan Guard
- FB4 Device Info
- Exit Menu

Slave mode
Slave mode
Slave mode allows for scheduling shows across multiple projectors. When setting up a show which uses multi FB4’s, one laser will need to act as master. This laser will need to be set in Autoplay mode. Other FB4’s that need to perform in the same show, must be placed in Slave mode so that they will follow the master FB4.
For the master/slave functionality to work, all FB4’s need to be connected to the same ethernet network.
The laser is now configured as "slave", and waiting for the signal from the "master" laser.
During this operation mode, the following menu options can be controlled:
For the master/slave functionality to work, all FB4’s need to be connected to the same ethernet network.
- Configure the Slave mode:
Turn the selection rotary dial until the cursor points to the menu item "Operation mode" and press it once to expand the menu options: - Turn the rotary dial until the cursor points to the desired operating mode (Slave Mode) and press it once. The selected operation mode (Slave Mode) is now active:
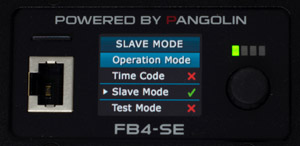
The laser is now configured as "slave", and waiting for the signal from the "master" laser.
During this operation mode, the following menu options can be controlled:
- Operation Mode
- Master Settings
- Geo Correction
- Color Settings
- Scan Guard
- FB4 Device Info
- Exit Menu

Test mode
Test mode
The Test mode has been created to give you the ability to open up a test frame without the need to connect other equipment. Test frames will need to be prepared and uploaded through Pangolin’s QuickShow or BEYOND its FB4 Export Utility. During preparation of the test frames an ethernet cable is required. Once the test frames are located on the SD card of the FB4, there is no cable connection needed to activate Test mode.
During this operation mode, the following menu options can be controlled:
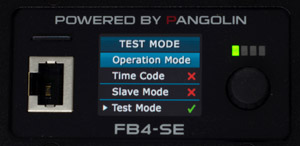
- Configure the Test mode:
Turn the selection rotary dial until the cursor points to the menu item "Operation mode" and press it once to expand the menu options: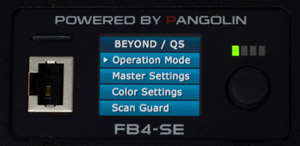
- Turn the rotary dialuntil the cursor points to the desired operating mode (Test Mode) and press it once. The selected operation mode (Test Mode) is now active:
- Turn the selection rotary dial until the cursor points to the menu item "Test Mode Setup" and press it once. The following settings become available::
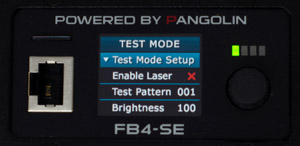
- Enable Laser: Enables laser output
- Test Pattern: Determines which test frame on the SD card will be displayed
- Brightness: Determines the maximum brightness used during display of the test frames
- Master Size: Determines the X and Y size of the projection output
During this operation mode, the following menu options can be controlled:
- Operation Mode
- Master Settings
- Test mode Setup
- Geo Correction
- Color Settings
- Scan Guard
- FB4 Device Info
- Exit Menu